Printed circuit boards (PCBs) are essential components of most modern electronic devices. As electronics manufacturing has expanded globally, the PCB fabrication industry has grown along with it. For electronic hobbyists, makers, and independent designers, producing PCBs themselves can save money compared to ordering from a professional PCB shop. However, setting up your own PCB production requires an initial investment. In this article, we’ll look at the costs, challenges, and potential profits of making your own PCBs.
Equipment Needed for PCB Fabrication
To produce professional-quality PCBs yourself, you’ll need the right equipment. Here’s an overview of the key items required:
PCB Design Software
- To layout the circuitry and routing, you’ll need electronic design automation (EDA) software. Popular options include:
- KiCad – Open source, free
- Eagle – Limited free version, paid upgrades
- Altium – Industry standard, expensive
- Many people start with KiCad or Eagle free versions. Paid EDA packages offer more features.
Laser Printer
- To transfer the layout pattern onto the copper board, you’ll need a laser printer. Inkjets may blur or smear during transfer.
- A basic monochrome laser printer like the Brother HL-L2370DW is sufficient.
Laminator
- A laminator applies heat and pressure to transfer the toner onto the copper. Options include:
- Small 9″ pouch laminator – under $50
- 12″ wide roll laminator – $100 to $300
Etching Tank
- To etch away unwanted copper, you’ll need an etching tank with pump, heater, and chemicals. New turnkey systems cost $200 to $300.
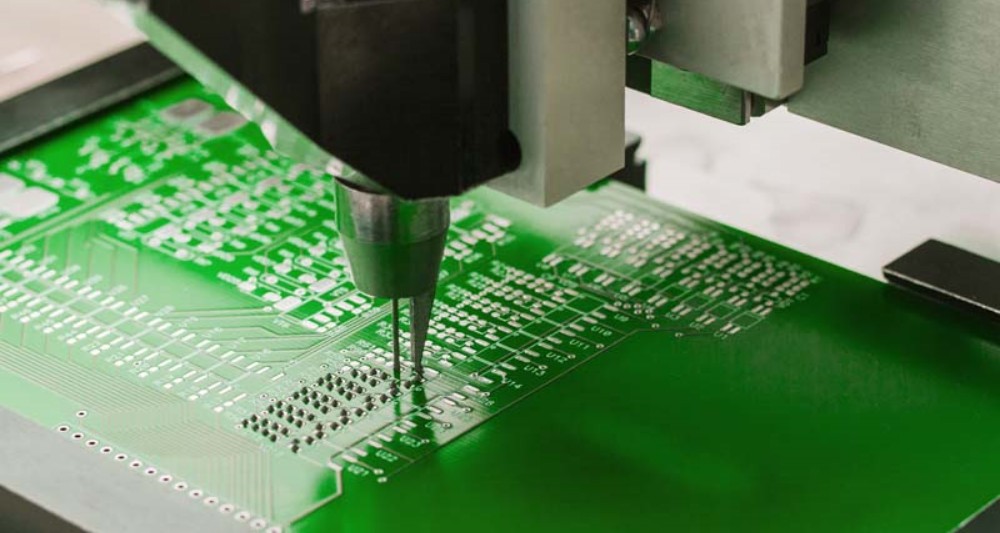
Drill Press
- For drilling precision board holes, a drill press with fine bit adjustment is ideal. A basic 8″ press like the WEN 4214 will suffice.
- Smaller handheld drills can work but make it harder to drill holes vertically.
Soldering Equipment
- To solder components onto the finished PCB, you’ll need soldering tools like:
- Soldering iron (under $50)
- Solder wire, solder wick
- Fume extractor
Miscellaneous
- Other useful items include magnification, small tools, cleaning supplies, and more:
- Jeweler’s loupe
- Flush cutters
- Masking tape
- Isopropyl alcohol
- Brushes
- Tweezers
So in total, starting from nothing, expect an equipment outlay of $500 to $1000 to assemble an effective home PCB fabrication setup.
Direct Costs of Materials
The materials that go into each PCB add direct costs on top of the equipment outlay. Here are typical costs per 8″ x 8″ board:
Blank Copper Boards
- FR-4 blank double-sided copper boards cost $5 to $10 each in small quantities.
- Pre-sensitized photoresist boards run $15 to $20 each.
Chemicals
- Developer, etchant, stripping chemicals can cost $1 to $3 per board depending on size.
Copper and Tin
- For a 1 oz copper board, $1 to $2 worth of copper is etched away.
- Tinning chemicals to prepare the pads costs under $1 per board.
So in total, expect $10 to $15 in materials per small PCB. Larger boards with more layers would cost more.
Economies of Scale
Producing PCBs yourself only in small quantities will incur high per-unit costs. As production increases, economies of scale can lower costs:
- Bulk purchases of blank copper boards, chemicals, etc. bring the per-board cost down.
- Amortizing equipment costs over more boards reduces overhead.
- Optimizing processes improves efficiency.
Therefore, maximize production volume whenever possible. Make multiples of the same board design when you can, rather than switching small batches.
Potential Profits
To estimate potential profits, compare your costs to prices from PCB manufacturers:
- Small quantity prototype PCB prices start around $50 to $100 per board from China, $200 to $300 per board for US quick-turn.
- Mid-volume production of 25-100 boards can cost $10 to $30 each.
- Mass production overseas can be $2 to $5 per board.
So if your costs are under $15 per board, there is room for profit, especially at low to mid production volumes.
However, pricing is driven by:
- Board size – smaller boards use fewer materials.
- Layer count – 2-layer boards are cheapest. More layers means more process steps.
- Lead times – Faster turnaround warrants higher prices.
- Minimum order sizes – Smaller batches have higher overhead costs.
Maximize profits by optimizing designs for your production processes and capabilities. Target board sizes, layer counts, quantities, and lead times that align with your costs.
Challenges of DIY PCB Production
Producing quality PCBs yourself has some key challenges:
- Learning curve – Developing proficiency at PCB design and fabrication takes study and practice. Be prepared for scrapped boards at first.
- Consistency – Ensuring consistent quality across larger production volumes requires careful process control.
- Time investment – The fabrication process has many time-consuming steps. The equipment can also require maintenance and troubleshooting.
- Limited capabilities – Home PCB production is best suited for simpler board designs. Expect limitations on things like:
- Fine features – minimum trace/space is ~6 mil.
- High layer counts – max of 2-4 layers typically.
- Tight tolerances – challenging for home drilling/etching.
Summary of Profit Potential
In summary, making PCBs can be profitable with the right approach:
- Startup costs around $500 to $1000 for equipment.
- Direct materials as low as $10 to $15 per board.
- Potential to undercut commercial board houses significantly.
- Highest profit margins at low to mid-volume production.
- Consistency and quality control are key challenges.
For high production runs, outsourcing to large board manufacturers makes more economic sense. But for prototypes, custom or niche boards, or volumes under 100, in-house PCB fabrication can save money if done right.
With practice and experience, PCB fabrication can become a profitable micro-business or side-hustle for electronics enthusiasts.
Frequently Asked Questions
What size PCBs can I make at home?
- For home fabrication, maximum board size is typically around 8″ x 10″. Larger requires equipment beyond typical DIY budgets.
What PCB layer count is realistic?
- 2 layers is the most feasible for home etching. With difficulty, 4 layers may be possible with careful alignment. More than 4 layers is highly challenging without professional equipment.
What tolerances are achievable?
- For feature size and alignments, expect home-made PCBs to only achieve around ±5 mil tolerances compared to ±2 mil for commercial boards. Fine pitch components may be problematic.
Can I produce flex PCBs myself?
- Flexible PCBs require different materials and processes compared to rigid FR-4 boards. They are not practical for home fabrication.
How many boards makes in-house production economical?
- With equipment costs amortized, DIY can become cheaper than buying as low as 10-25 boards. But the more you can make, the better the economics.
In summary, PCB fabrication has some high startup costs, but with experience and refinement of processes, has the potential to be a profitable endeavor for medium-scale production. The challenges come in consistently producing professional-quality boards and managing the time investment required. But for electronics hobbyists, the ability to easily iterate custom PCB designs can make the investment very worthwhile.


Leave a Reply